A Beginner’s Guide to Starting a Vegetable Garden
Do you enjoy fresh, great-tasting vegetables? Have you considered growing your own? It’s so rewarding and relatively easy.
If you have a large space and want enough for your family or are limited in space and only need to provide for yourself, you’ve never had a garden (or need a refresher), and don’t know where to start, you’re in the right place.
Gardening can seem daunting if you’ve never done it, but it doesn’t have to be.
For me, the magic lies not only in the process but also in the reward – the unparalleled flavor, health benefits, and nutrition I gain with my garden. The only thing better than picking ripe tomatoes, crispy lettuce leaves, or tender green beans is eating them! I love veggies straight off the plant.
Along with research-based best practices as your guide, a bit of planning, some prep work, the right amount of nutrients, water, sun, and time, you’ll be on your way to making your very own homegrown vegetables a delicious reality.
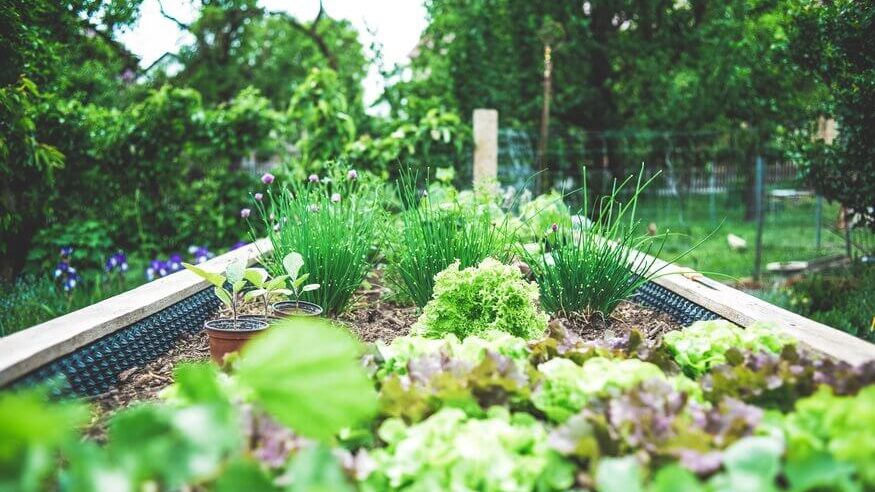
Select the Best Location for Your Garden

When gardening, the most important decision to make is always the location of your garden. It depends on the right amount of sunlight, good soil, water, room to grow, and climate. Once you choose the location, the first step is done.
When deciding on a location, you need to consider sunlight. Imagine your garden as a solar panel, and sunlight as its source of energy. Since most vegetables are sun worshippers, they thrive on direct sunlight, the more, the better. Look for a spot in your yard that receives at least 6-8 hours of full sun each day. South-facing areas typically get the most sunlight which makes them excellent choices.
While some leafy greens (lettuce, spinach, kale, etc.) can tolerate partial shade, most vegetables, like tomatoes, peppers, and cucumbers, demand sunlight for optimal growth and fruit production. Insufficient light can lead to leggy, weak plants and smaller yields.
While sun is a necessity for all vegetable growth, soil is the foundation upon which a successful garden is grown. Always take the time to check the soil quality in your chosen location. Is it well-draining, loose, and rich in organic matter, or is it compacted, rocky, or clay-like?
If your soil is not perfect, it’s okay. Mine isn’t great and I’ve had success improving it by adding compost and organic matter. I’ve also grown vegetables in raised beds and containers where I easily amended the soil to the plants I wanted to grow. Those are excellent options if your soil is less than ideal because they provide more control over soil conditions.
Just as we need water to live, plants do too. Be kind to yourself and make a water source easily accessible. Think about how convenient it will be to get water to your plants. The last thing you want is to lug heavy watering cans or hoses across your yard every day.
If you don’t have a nearby water source, you may need to install a drip irrigation system or invest in a long hose to provide proper irrigation and consistent moisture levels. I’ve done both and prefer drip irrigation. Setting up a drip system is a bit more work but worth it in terms of efficiency and convenience.
The size of a garden depends on available space and the desired yield. I started small with a few containers and then moved to raised beds. You should also consider accessibility since you’ll spend a good amount of time in it.
Understanding your hardiness zone (local climate) is essential when selecting which vegetables to grow as different crops thrive in different conditions. Some are cold hardy and can grow in a short period while others require a longer growing season and warmer temperatures. I’ve had gardens in both cold and warm climates and found that certain plants grow much easier in one area or the other, while some do well in both.
Additionally, your garden may have microclimates – small areas with slightly different growing conditions due to factors like shade, wind, or nearby structures. A garden on the south side of a structure will potentially have different sun exposure from a garden on the north side of the structure. Likewise, a garden to the east or west of a large tree will have shade at different times of the day. Microclimates can make a big difference so pay attention.
Take the time to thoroughly evaluate potential locations for your vegetable garden because your future vegetable success begins with thoughtful site selection and planning.
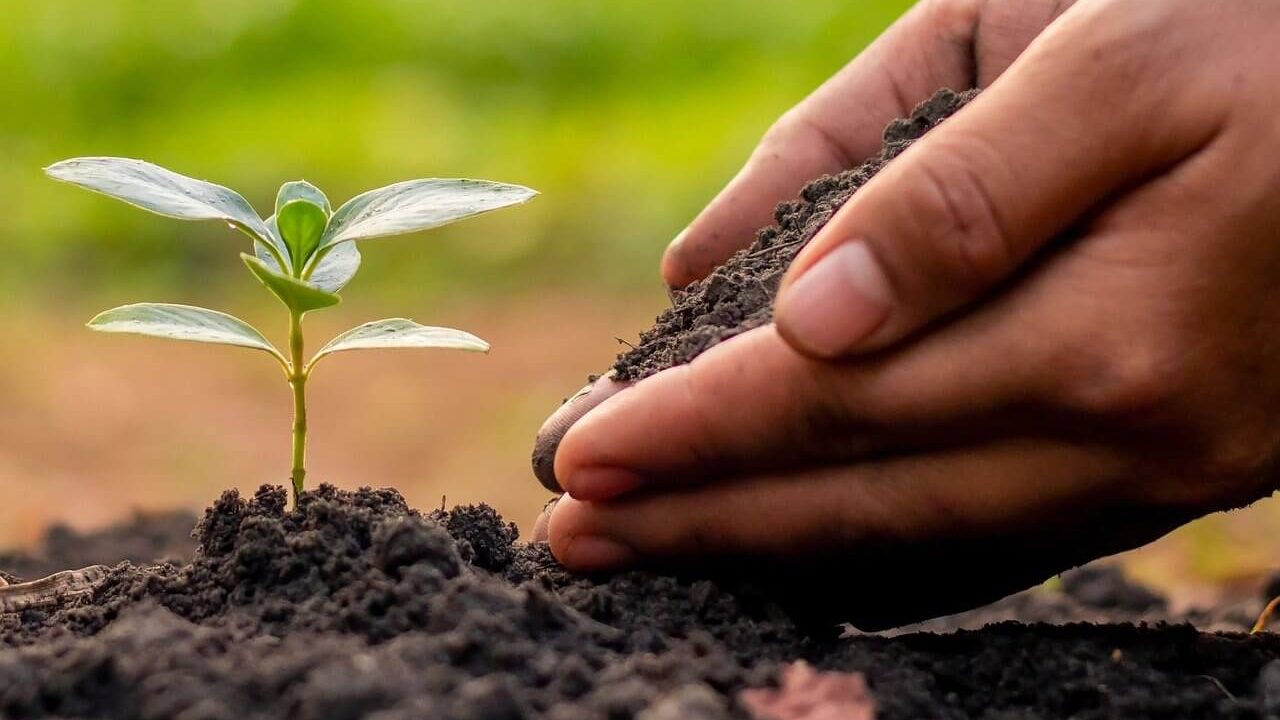
Soil Preparation
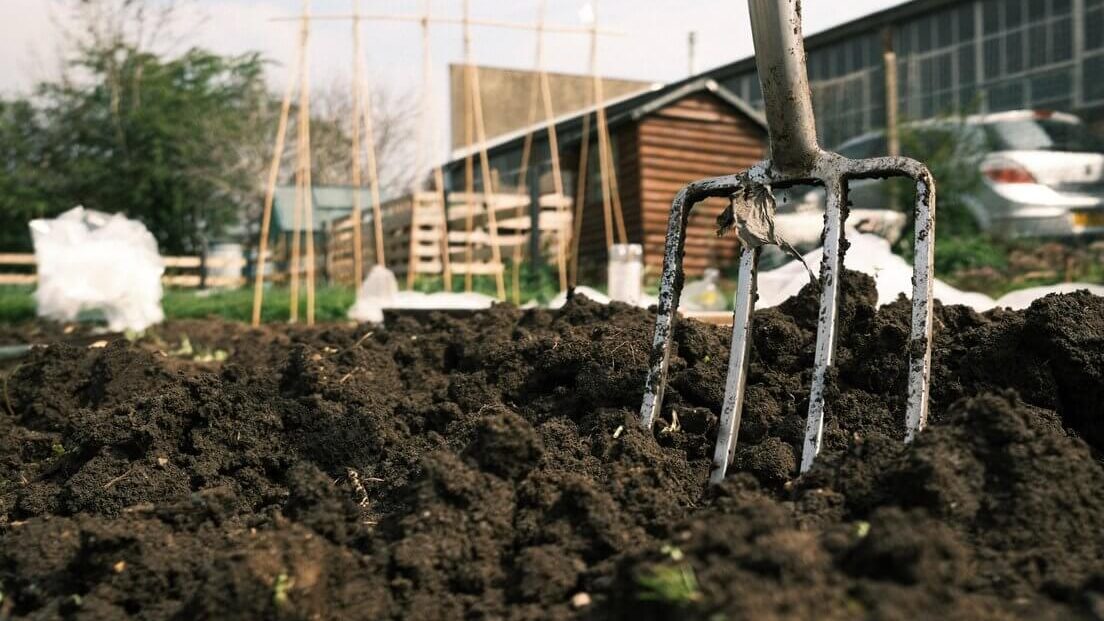
When the right location is chosen it’s time to prep the soil. Successful gardens depend on this, and so does healthy plant growth, strong root development, and plentiful harvests.
Think of soil as the storehouse of food and vitamins for the plants. If nutrients are in abundant supply, plants grow well. If nutrients are lacking, they don’t grow well or, in some cases, may not grow at all.
Before you add anything, it’s a wise idea to conduct a test to learn your soil’s pH level and nutrient content. Agricultural extension offices usually offer testing, or you can buy a commercial test kit.
Understanding soil pH is essential and influences which nutrients are available. Since most veggies thrive in slightly acidic soil, adjusting the pH, if necessary, can make a big difference in your plants’ health.
My experience is the results will explain to you what amendments to add. Most often it will be helpful to add organic matter. Make the changes as stated in the results and the soil should be able to retain more moisture yet also have good drainage while getting more nutrients to the plants.
I prefer compost because it provides the nutrients for the plants and is organic. Soil fertility is enhanced as well as a healthy ecosystem of beneficial microorganisms. I like to spread 2 to 4 inches over my garden and mix it into the top 6 to 8 inches of soil with a shovel or hoe.
Usually, people need to add organic amendments to address deficiencies. Normally these amendments include bone meal (for phosphorus), greensand (for potassium), and well-rotted manure (for nitrogen). If they are needed, the test results should show exact amounts to add just like ingredients in a recipe.
To enable my plants’ roots to penetrate the soil easily, I use a garden fork or tiller to break up any compacted areas of soil. The goal is loose, crumbly texture which allows for better root development and easier water penetration.
I avoid excessive tilling because it can disrupt the natural ecosystem in the soil. Over time, a healthy garden should require less tilling as the soil structure improves. I also rarely step on the prepared soil as this compacts it and makes it difficult for plants to grow.
Mulch should always be used and is a protective blanket for soil. An organic layer, such as straw, leaves, or wood chips, around plants helps maintain consistent soil moisture, suppresses weeds, and moderates soil temperature.
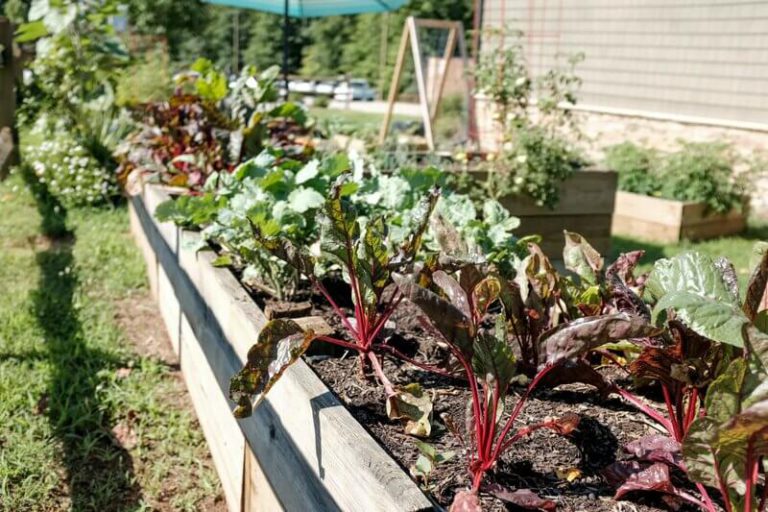
If your soil quality is less than ideal or if you have limited space, consider using raised beds or containers like I do. Because I control the soil that is used in my containers and raised beds, healthy soil is easier to maintain which can be useful for beginners.
As you prepare your garden, soil prep should always be the first big step. The result will be excellent produce because the soil has the right consistency and nutrients for the plants to grow.
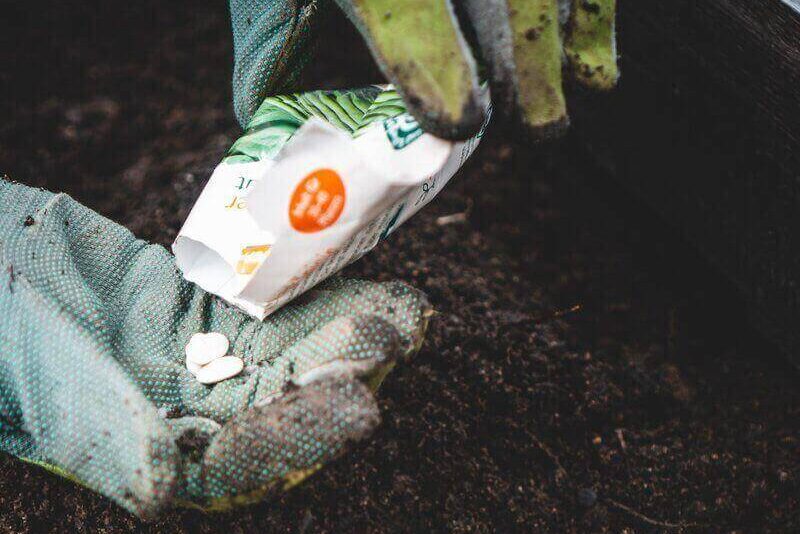
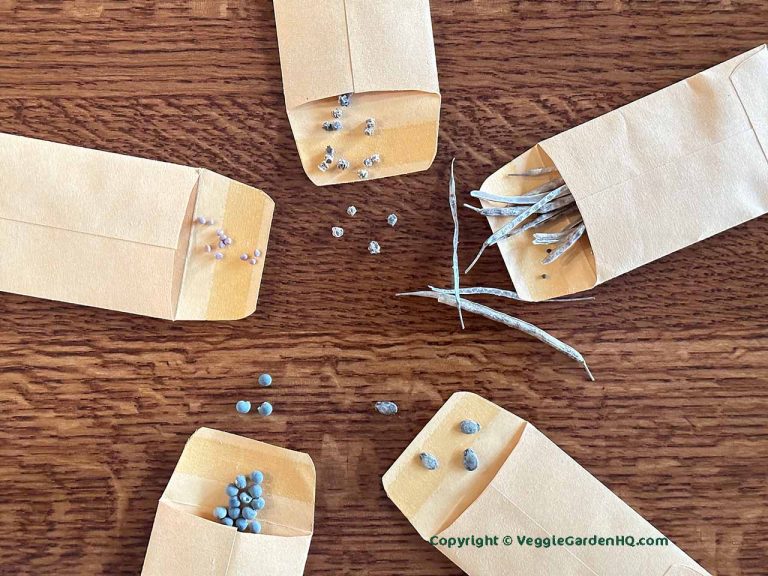
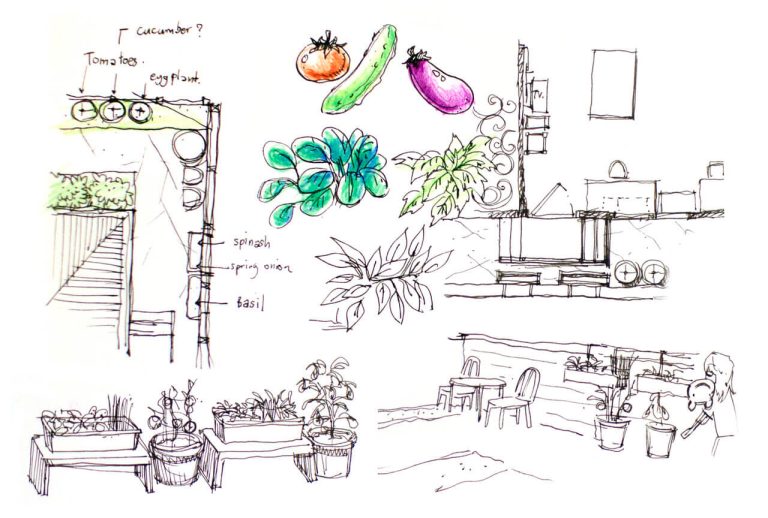
When the soil is ready, it’s time to select seeds to start. I love choosing seeds and if you’re like me and you love looking through seed catalogs too. When shopping, it’s important to understand which USDA plant hardiness zone we live in. Zones are based on the weather at our geographical location. It’s best to choose varieties that are adapted to our area because this will increase our chances for success.
Your garden size also depends on which vegetables you can grow. If space is limited, think about compact or vertical-growing varieties. Or, if you have lots of space, you can experiment with many different varieties and not have to worry about spreading out your plants.
When you’re considering what to grow, think about vegetables you and your family enjoy eating. I start with a list of our favorites and add a few new ones to try each year. Because I grow what I love to eat, I love gardening even more.
If you’re like me and like to try new things, go ahead and plant seeds for something you’ve never eaten. By experimenting this way, you might find a new variety that you wouldn’t otherwise have thought about. With gardening, the more I grow the more I learn. This makes me excited and makes me want to try more and more. My advice is to keep trying new varieties.
To maximize harvest and produce year-round, plan your selection to include both cool-season and warm-season crops. Cool-season vegetables, like lettuce, spinach, and broccoli, grow best in cooler temperatures. Warm-season crops, such as tomatoes, peppers, and cucumbers, prefer warmer weather.
Companion planting, strategically growing plants together, can be beneficial in many ways. It helps to deter pests while improving soil quality which allows each to grow better. Many gardeners plant marigolds alongside tomatoes to help repel nematodes, or basil to improve the flavor of tomatoes. Planning always makes a better garden.
Constant crop rotation maintains soil health and minimizes disease buildup by breaking pest and disease cycles and also maintains fertile soil. I like to keep a garden journal and note the location and plants I grow each year. It’s easy to do as I’m planting seeds and makes the rotation of crops easy to remember.
As you begin your garden, consider starting with some of the easier vegetables to grow. Tomatoes, lettuce, zucchini, and radishes are forgiving and good veggies to start with.
I like to think of my garden as a canvas and I’m the artist. When I take time and incorporate all the variables into my plan, I can create a super garden.
When to Begin Planting
With your garden site prepared and your vegetable selection carefully chosen, it’s time to get your hands in the soil and start planting. Planting and timing are super important in vegetable gardening. Healthy growth and bountiful harvests depend on it.
Knowing which USDA Hardiness Zone you live in and understanding your region’s frost dates is key to successful planting. Frost dates are the average last and first frost in your area and let you know when it’s safe to plant outdoors.
The first vegetables to plant each year are the cool-season crops. Vegetables like peas, lettuce, and carrots like cooler weather and can survive in light frosts. Plant these as soon as the soil can be worked in early spring or late summer for a fall harvest.
Warm-season vegetables such as tomatoes, peppers, and cucumbers like hot weather. Wait until all danger of frost has passed before planting them. Depending on where you live, this will typically be in late spring or early summer.
When it comes to planting, each vegetable has preferences for spacing and depth. Seed packets and plant labels (if you’re transplanting) list this information. Giving each plant the proper spacing promotes good air circulation and reduces the risk of disease.
I like to plant more seeds than called for in case some fail to germinate. When the seedlings first begin to grow, I thin the plants to the recommended spacing. This ensures I have as many plants as possible that grow to maturity.
Vegetable seeds are picky about soil temperature. Some vegetables, like beans and corn, need warmer soil temperatures to germinate successfully. If you’re unsure how to measure soil temperature you can purchase a soil thermometer to ensure you’re planting at the best temperature range for your chosen plants.
Decide whether you want to start your vegetables from seeds or purchase transplants. Starting from seeds offers more variety and control but requires more time and attention. Transplants are convenient and get you closer to harvest sooner. No matter which you start with, make sure they’re healthy and disease-free.
To keep your harvest going and avoid a glut of vegetables all at once, practice succession planting. This means planting small batches of your chosen vegetables at intervals throughout the growing season. For example, sow a row of lettuce every few weeks to enjoy a continuous supply rather than a single large crop.
Proper watering is essential during the early stages of plant growth. Once your plants are more established, water deeply and less frequently to encourage deep root growth.
Remember to put 2-4 inches of organic mulch on the soil to keep it moist, regulate temperature, and keep weeds from growing. Your plants will benefit greatly from this.
Inclement weather can do irreversible damage so be ready to protect your garden. Use row covers or cloths to shield it from late spring frosts or intense summer sun. Like a prepared Boy Scout, having a plan in mind in case you need to protect your garden could mean the difference between a successful growing season or a frustrating setback.
Minding that you need to plant at the right depth, the right time, and give your plants the proper care they need, will give your vegetable garden the best chance to succeed.
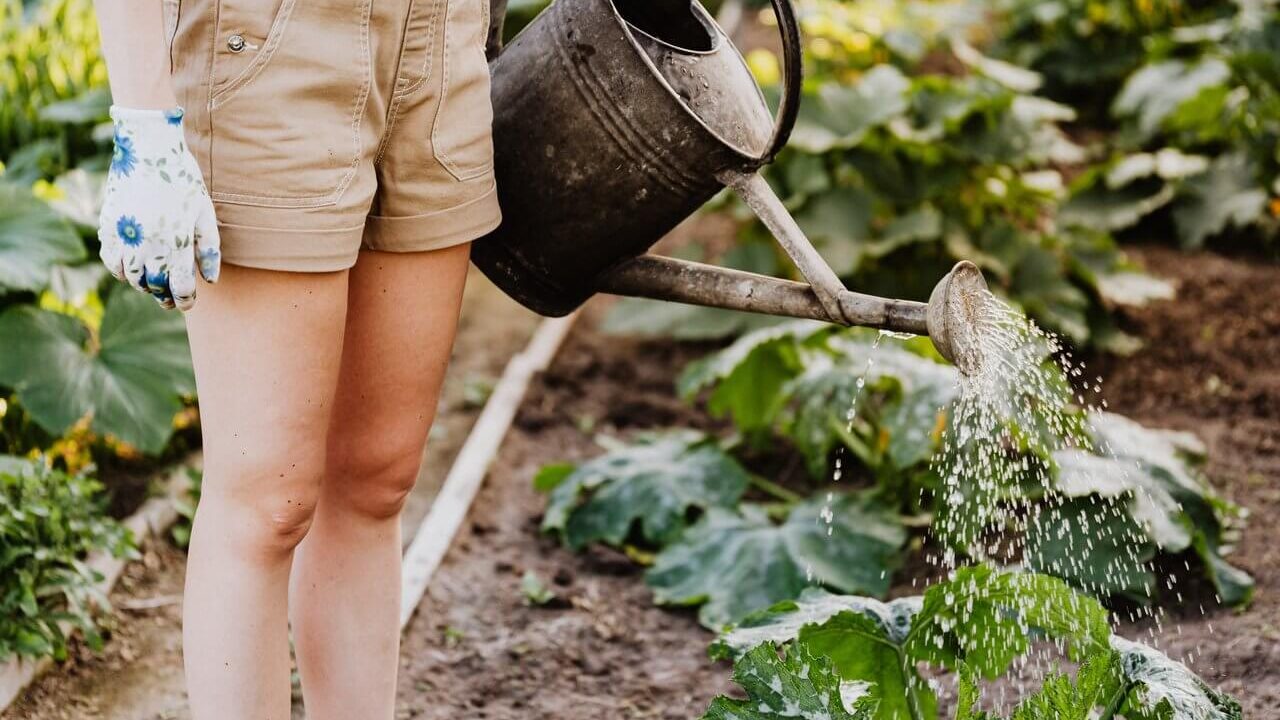
Water for Your Garden
Let’s face it, we all know how important water is in our lives, right? Well, it’s the same for our plants. And when vegetables are growing, they need a lot of water. Many of them are over 90% water by weight. Suffice it to say if your plants don’t get the water they need they won’t give you the vegetables you want.
If you can remember your high school biology teacher talk about cells, you already know that water plays several critical roles in the growth of vegetables:
- Nutrient Transport: Water carries essential nutrients from the soil to the plant’s roots, allowing them to thrive and produce.
- Photosynthesis: Plants use water to carry out photosynthesis, the process by which they convert sunlight into energy and produce food.
- Cell Structure: Water helps maintain the turgidity of plant cells, keeping them firm and upright.
The time of day you water is important. Morning is best because it allows the plants to take up the moisture they need before the heat of the day sets in. Avoid watering in the evening or at night, as this can create a humid environment conducive to fungal diseases.
How you water is also important. Will you hand water, use drip irrigation, use a soaker hose, or use a sprinkler?
There’s no right or wrong. Pick a method and run with it. Over time you can change or upgrade your system to make it more elaborate so that watering is more automatic and less time-consuming for you. Whatever watering system you use, just be sure that you’re consistent.
Vegetables prefer even moisture levels to prevent stress and ensure healthy growth. Don’t forget to check your soil moisture regularly, and adjust your watering schedule based on any rainfall you may have received.
Be particularly mindful of giving your garden more water during dry spells and remember the mulch you added to your garden during planting will also help to retain moisture in the soil.
However, take care not to overwater as it can lead to root rot, and fungal diseases, and leach away essential nutrients. To determine if your garden needs water, stick your finger about an inch into the soil. If it feels dry at that depth, it’s time to water. If it’s still moist, wait a day or two before checking again.
When you water, aim to soak the soil deeply rather than giving your plants a shallow drink. Deep watering encourages plants to grow their roots deep searching for water which makes them stronger and more able to survive periods of drought.
Like a loving mother providing for her children, when you offer your garden water the way it needs, you’ll see your vegetables thrive and produce flavorful, abundant harvests.
Fertilizing Your Garden
We need food to live, and plants are no different. If your goal is a productive garden that yields nutrient-rich vegetables, you must start with good soil. And, often, the soil needs a bit of help to enable plants, especially vegetables, to grow and meet our expectations.
Plant food can be broken down into two categories: macro-nutrients and micro-nutrients. Macronutrients are the primary nutrients that plants need. The main three include nitrogen (N) to promote leafy growth, phosphorus (P) to support root development, and potassium (K) to enhance flower and fruit production.
They also need micronutrients but in smaller amounts. These include iron (Fe) for transferring energy, manganese (Mn) to activate metabolic reactions like plant maturity and chlorophyll production, and zinc (Zn) to make protein and hormones, among others.
When these nutrients are added to soil it’s known as fertilizer. Just as with our diet, it’s important to not overfeed them as overfertilization can cause damage.
The best way to figure out what your soil needs is to test it. From the test you’ll find out what the nutrient levels are and how much of each needs to be added for the best success.
Fertilizer comes in organic and synthetic varieties. I prefer organic fertilizers because they are derived from natural sources such as compost, manure, bone meal, and fish emulsion, and release nutrients slowly over time to improve soil structure and microbial activity. Although synthetic fertilizers come in a readily available form and act quickly, they are manufactured chemically and may lead to nutrient imbalances and soil degradation if overused.
Determining when to apply fertilizer depends on what type you choose. I add organic matter and slow-release organic fertilizers as I prepare the soil before planting. This way the plants have the right amount of nutrients all season long.
During the growing season, I will sometimes add fertilizer along the sides of the rows or around each plant to replenish nutrient levels. Although I prefer to use organic fertilizer, synthetic may also be used when side-dressing once growth has begun.
A third method to address nutrient deficiencies is to spray a diluted fertilizer solution directly onto the plant’s leaves for direct absorption.
Healthy plants that produce well need a balanced ratio of the macronutrients N-P-K (nitrogen-phosphorus–potassium). Look at the labels on all fertilizer packaging, both organic and synthetic, to see the proportion of each nutrient contained in the product. Different vegetables have varying nutrient needs, so be sure to choose fertilizers with appropriate ratios based on your chosen crops.
We discussed that overwatering is harmful to plants and overfertilizing is too. Too much fertilizer is problematic and can cause nutrient imbalances, water pollution, and soil degradation, so always follow the recommended application rates. If possible, try not to use synthetic fertilizers, which can be particularly harmful.
I like compost because it’s natural and adds organic matter and nutrients to the soil. Because I add it regularly, my plants are always well fed, the soil structure is improved, and can hold more moisture so it needs less supplemental water.
Remembering to rotate your crops each year will help prevent nutrient depletion and maintain soil health. Different crops have different nutrient needs, so rotating them can reduce the strain on specific nutrients in the soil which will also help combat plant diseases.
Now that you know why soil and the nutrients in it are so important, you can take better care of your garden. Those well-fed plants will show their appreciation by producing plentiful and healthy fruit in return.
Pest and Disease Management
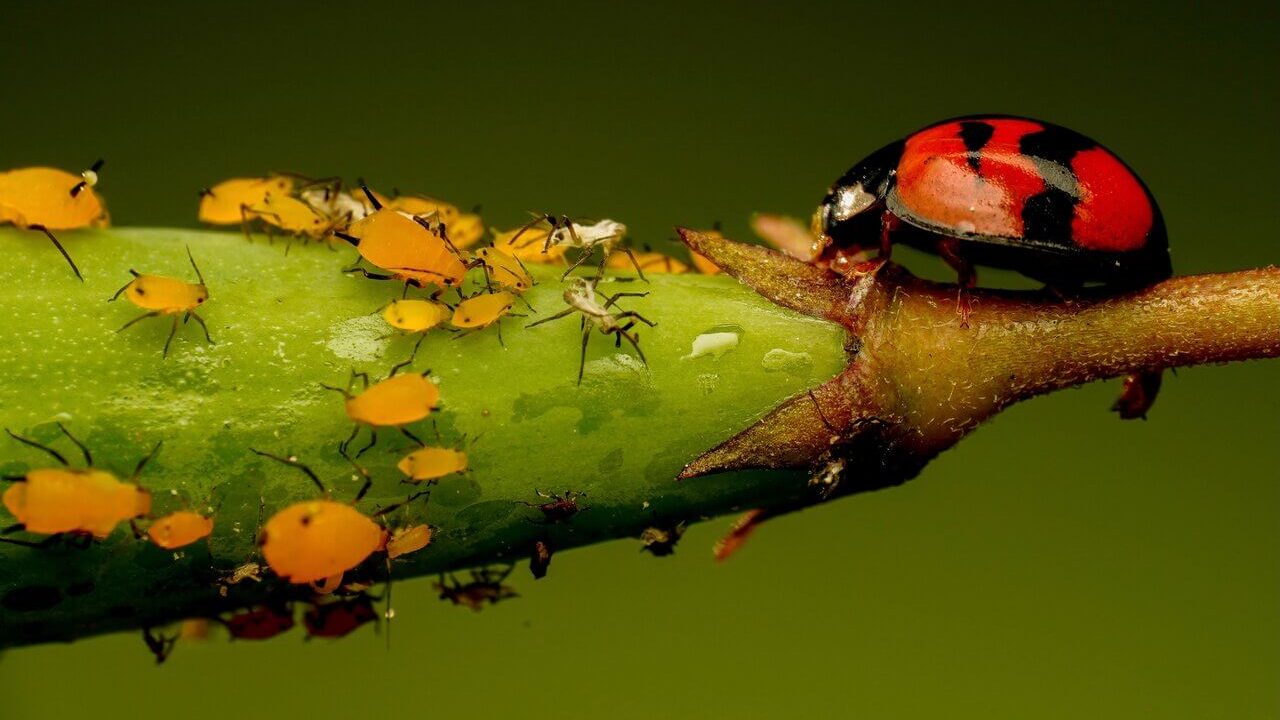
You’ve planned, prepped, planted, watered, and fed your garden and the last thing you want is for your growing plants to be overcome by disease or pests. If you can quickly identify and effectively manage these threats, your garden will thank you.
Keep an eye on your plants and inspect them regularly for any signs of trouble such as damage from pests (chewed leaves, holes, discolored foliage, and visible insects), from diseases (wilting, yellowing, brown spots, mold, or any unusual growth patterns), and from weeds (remove them promptly) which can compete with your vegetables for nutrients and harbor pests.
The first line of defense is to maintain fertile soil and keep your plants healthy. If you have strong plants, they’re going to fight off attacks from pests or diseases a lot easier. Your next step is to rotate crops annually. While succession planting within the same family of plants can encourage problems, rotating crops discourages issues because it disrupts the pest and disease life cycles.
All 50 states in the US have agricultural extension offices that are ready to help, so check with them for a list of vegetable varieties that are known to be resistant to these attackers.
Don’t overwater because excessive moisture can create conditions conducive to fungal diseases. Water at the base of plants using a drip system or soaker hose to keep foliage dry.
Utilizing a natural defense like strategic companion planting can confuse and deter pests. For example, planting basil near tomatoes can deter aphids and other pests that commonly enjoy dining on those plants. You could also plant marigolds alongside your tomatoes, peppers, and cucumbers for a double bonus – pretty flowers and pest control.
Although we want to deter some pests, there are beneficial insects and animals (ladybugs, lacewings, spiders, and certain birds like sparrows) that are helpful in our gardens and keep unwanted insects in check.
Consider using organic pest control methods, such as neem oil, diatomaceous earth, or insecticidal soap, for minor infestations of the insects we don’t want. Since organic products are natural, they don’t tend to hurt the environment or our beneficial insects.
A fun way to involve your children in gardening is to let them help with a ladybug release. Ladybugs are beneficial insects and enjoy eating the aphids that are pests. My children did this when they were little and loved it.
For small gardens or localized pest problems, hand-picking pests like caterpillars and snails can be effective. Use gloves and toss them in a bucket of soapy water to dispose of them.
Diseased plants can spread to other healthy plants, so if you notice signs of disease remove the affected plant immediately and put it in the trash, not your compost.
As a last resort, consider using chemical fungicides or pesticides for severe pest or disease outbreaks. When using any synthetic chemicals, always follow the manufacturer’s instructions carefully. It’s very important that you use these products sparingly, so you don’t harm your beneficial insects or the environment.
When your garden is healthy, it is much more likely to be able to ward off disease and pests or recover more easily if issues happen.
Harvesting and Storage
You’ve worked hard and waited patiently while your garden grew. With that work behind you it makes sense that you’ll want to harvest when your veggies are at their peak. Fresh vegetables picked at their peak taste the best and have the most nutritional value.
Plan to pick during a cooler part of the day and not during the heat of the day. Morning is my favorite time to harvest. Not only is the cooler temperature more pleasant for me, I know it helps preserve the freshness and flavor of my produce too.
Being able to identify the signs for each plant is important:
- Tomatoes: Harvest when the fruit is fully colored and firm but not hard.
- Peppers: Pick when they reach their desired size and color. Most peppers turn from green to red, yellow, or another color when ripe.
- Cucumbers: Harvest when they are firm, green, and about 6-8 inches long. Avoid letting them become overripe and yellow.
- Leafy Greens: Toss any wilted or yellow leaves in your compost and harvest young leaves for the best flavor.
- Root Vegetables: Harvest these vegetables (carrots, radishes, and beets) when they are the size that works best for your cooking needs but know they can remain in the ground until you’re ready to use them.
- Beans: Pick when they are slender and firm, before the seeds inside start to bulge.
- Herbs: Harvest just before they begin to flower.
When harvesting, use pruners, scissors, or a sharp knife to cut stems cleanly rather than pulling or tearing, which can harm the plant. When harvesting herbs, trim the leaves, leaving a portion of the plant to continue growing.
Be sure to handle harvested vegetables carefully and as little as possible to prevent bruising or damage. I have a basket that I use in the garden just for this purpose.
For vegetables that are sensitive to heat, such as lettuce and leafy greens, consider cooling them immediately after harvest. I like to pick these last and then put them into a bowl of ice water in my kitchen for a few minutes to maintain their crispness.
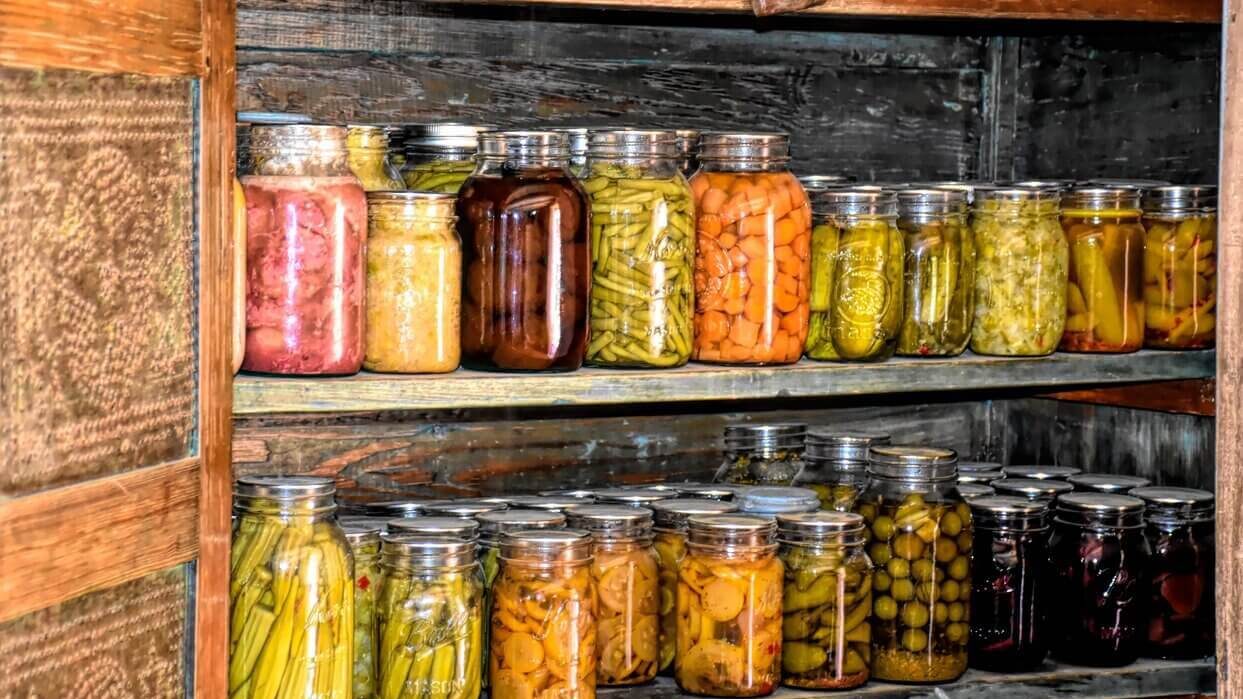
Once your veggies are cleaned, you need to store them the right way to maintain their freshness as long as possible until you’re ready to eat them.
Short-term storage in your refrigerator will keep most vegetables fresh. Use a resealable bag with holes poked in it or airtight containers. Place these in the crisper drawer and keep in mind that leafy greens like high humidity while root vegetables like low humidity.
If you are fortunate enough to have a root cellar, vegetables like carrots and potatoes will maintain their freshness longer in that cool and dark environment. Other vegetables like winter squash and onions, can be stored in a cool, dry, and well-ventilated area.
Consider blanching and freezing to preserve flavor and nutritional value if find yourself with an excess of vegetables. If you’re ambitious, you can try canning, which allows you to store them for the long term so that you can enjoy your homegrown vegetables year-round.
No matter what storage method(s) you use, label your stored vegetables with the harvest date to keep track of freshness and rotation, and regularly inspect your stored vegetables for signs of spoilage or decay. Remove any affected items promptly to prevent the spread of problems to other produce.
Ongoing Maintenance and Checklist
Congratulations, you grew a vegetable garden. Isn’t it a great feeling to know that you grew your own produce?
The best part is the whole process is repeatable year after year with just a little maintenance. Use this checklist to remind yourself of the steps for gardening every year:
- Weeds compete with your vegetables for water, nutrients, and sunlight so regular weeding is crucial to keep them in check.
- Keep the top 2-4 inches covered with mulch to help suppress weeds, regulate soil temperature, and conserve moisture.
- Pruning your plants encourages bushier growth and better airflow, reducing the risk of disease. Remove dead or diseased leaves and spent flowers to keep your garden tidy and to keep it healthy.
- Many vegetables, like tomatoes and cucumbers, benefit from staking or trellising to keep them off the ground and prevent disease. Use stakes, cages, or other support structures as needed.
- Keep your eyes open for signs of pests and diseases and act quickly to minimize damage if you notice telltale signs.
- Maintain your crop rotation plan to prevent soil depletion and the buildup of pests and diseases. Avoid planting the same crop in the same spot for consecutive seasons.
- Continue to fertilize your garden based on soil test results and the nutrient needs of your crops. Consider side-dressing with organic matter or compost to replenish nutrients during the growing season.
- Adjust your watering schedule as the weather changes and your plants’ needs evolve. Be mindful not to overwater and give just enough to maintain consistent moisture.
- Harvest regularly to ensure that vegetables don’t become overripe or go to seed.
- At the end of the growing season, clean up your garden by removing spent plants, weeds, and debris. Compost healthy plant material but discard diseased material to prevent future problems.
- Consider conducting soil tests at the end of the season to evaluate nutrient levels and adjust your soil preparation and fertilization plans for the following year.
- Keep a garden journal or use a digital app to track your garden’s performance, including planting dates, locations, crop varieties, and any notable observations (things that went well and things you’d like to try or change in the future).
- Gardening is a lifelong learning process so keep up with new techniques, varieties, and best practices.


11 Comments
Comments are closed.