Winter’s Coming: Are Your Garden Tools Ready?
4 Steps to Winterize and Store Garden Tools and Hoses
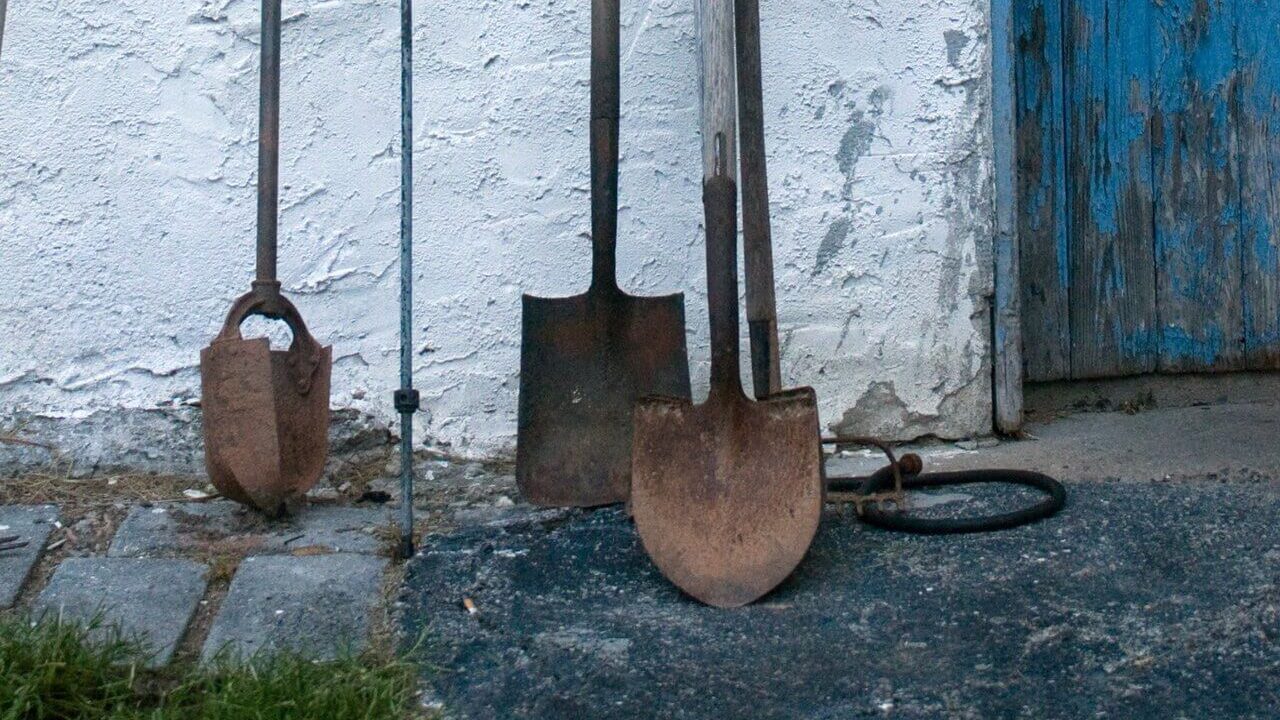
My gardening tools are trusted friends. They’re valuable and hardworking, there when I need them, and help me through the toughest situations when I can’t do it alone. They take care of me, and I want to take care of them.
I don’t take my tools for granted, and you shouldn’t either. The best ones are often pricey and need to be maintained to keep them in good working order. Caring for them is easy, especially if done consistently. Additionally, the lifespan of garden tools can be prolonged when you winterize and store them so they’ll be ready when you need them in your garden.
Each year as green foliage turns to varying shades of reds, oranges, and yellows before falling from their branches, I take my cue to complete a thorough maintenance checklist for each of my tools. By doing this, I not only prolong the life of my tools but also ensure they’ll be ready in the spring when I need them and will not spread diseases. I complete this easy process to winterize and store my garden tools each year.
1. Starting with Basics: Cleaning Techniques for Hand Tools
Dirt and Debris
The first step in my cleaning process is to remove all visible soil and debris that have clung to the tools during gardening. Using a coarse metal brush, I scrub off as much as possible. Depending on how clean it is at this point, I might need to use a damp rag to wipe anything remaining or use a bucket with warm soapy water for more challenging debris.
Another option is to use a hose and spray areas of caked-on dirt. This is especially helpful for tight spaces on rakes and in between the tines of tillers.
It is crucial to remove the bulk of organic material that can harbor harmful microorganisms over the winter. You do not want to store tools that are dirty over the winter.
Rust Removal
After the tool is clear of dirt and debris, use coarse-grade steel wool to remove rust. Soil and vegetative residue left on metal surfaces can cause rust. This contact with moisture causes the iron or steel to corrode and can also dull the cutting surfaces.
For significant rust or difficult-to-reach areas, soak the tool in a container of vinegar overnight for up to 24 hours. Upon removing from the vinegar, use steel wool to remove any remaining rust.
Using my hand, I gently feel for any rough areas or splinters on wooden handles. Rubbing with sandpaper should quickly smooth the areas. Replace the handle if it’s not repairable.
2. Guarding the Garden: Why Disinfecting Your Tools Matters
Preventing the spread of disease is important for plants just as it is for humans. Dirty gardening tools can act as vehicles for disease-causing pathogens and can transfer them from infected plants to healthy plants. It’s important to disinfect as you winterize and store your garden tools for the winter.
The table shows several methods commonly used to sanitize garden tools. Each has pros and cons, so choose the method that works best for you.
Sanitizing Methods
| Sanitizing Method | Pros | Cons | How to Use |
| Alcohol 70%-100% (Ethanol or Isopropyl) | •Can be used as a wipe •Does not need to be rinsed off •Immediately effective •Widely available •Relatively inexpensive •Easy to use | •Flammable, take precautions •May not effectively disinfect pruning tools used on apple trees infected with fire blight | •Dip, wipe, or spray hand pruner blades with alcohol before moving from one plant to the next •Allow to dry completely |
| 10% Bleach solution | •Common household product •Inexpensive | •Can react with other chemicals, use with caution •Can damage fabrics •Corrodes metal causing pits and nicks so it is not recommended for tools requiring a sharp edge •Easily inactivated by organic material •Disinfecting takes 10-60 minutes •Short lifespan, effectiveness is cut in half after two hours | •Mix one part bleach to nine parts water •Soak tools for 30 minutes •Rinse with clean water •Dry completely |
| Trisodium Phosphates (TSPs) | •Inexpensive •Available at hardware and home improvement stores | •More corrosive to pruning blades than bleach •Contact with skin can cause chemical burns •Pay close attention to the label as synthetic versions of TSP are useless for disinfecting | •Mix a 10% solution (one part TSP to nine parts water) •Soak tools for at least 3 minutes •Rinse with clean water •Dry completely |
| Lysol All-Purpose Cleaner (0.1% alkyl dimethyl benzyl ammonium saccharinate) | •Readily available •Does not corrode metal •Will not damage fabric •Usually come ready to use | •Do not use on polished wood, painted surfaces, or acrylic plastics •More expensive than other options | •Clean all visible dirt and debris from tools including crevices •Dip tool, spray directly on a tool, or soak tool for 2 minutes •Let air dry |
| Pine Oil Products | •Readily available •Not as corrosive as some other disinfecting products | •Not as effective as some disinfecting products | •Mix a 25% solution (one part oil to three parts water) •Soak tool in the solution •Rinse in clean water •Dry completely |
| Hydrogen peroxide | •Readily available • Cost-effective compared to commercial sanitizers •Non-toxic, biodegradable | •Long contact time, 20-30 minutes, to effectively disinfect tools •Essential that a 3% concentration is reached to ensure disinfection without harming plants | •Mix a 2:1 ratio (water to hydrogen peroxide) •Soak tools for 20-30 minutes •Rinse with clean water •Dry completely |
| Soap and water alone | •Commonly available •Inexpensive •Mechanical action of scrubbing with soap and water removes debris, grease, grime, and some viruses | •Need additional disinfectants to ensure any remaining pathogens are killed and prevent disease spread | •Mix soap in warm water •Thoroughly scrub tool with brush •Rinse with clean water •Dry completely |
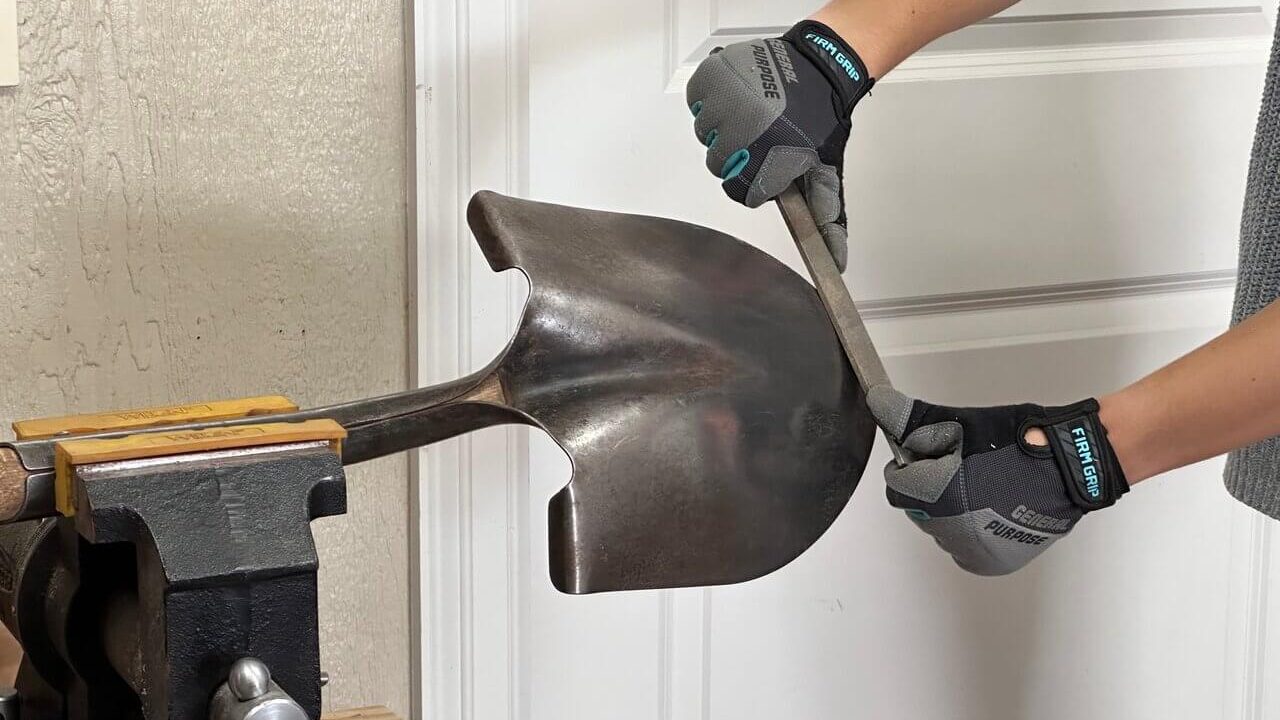
3. Rust Prevention: Ensuring Your Tools Stay Sharp and Efficient
Oiling
Oiling is a vital step you don’t want to skip as you winterize your garden tools to store them. Even if you are one to neglect them during the summer, this is the most important and one of the simplest things you can do to ensure they last as long as possible.
When iron (steel) contacts water and oxygen for an extended period, it oxidizes and forms rust. Simply applying a thin coat of oil over the metal will prevent the reaction and stop rust from forming. Concurrently applying oil to the wood parts will keep them from drying out and cracking.
Although some people debate the best type of oil to use, I use boiled linseed oil. It’s been around for ages and is made from the dried seeds of flax plants. Some people use motor oil, but I don’t want motor oil in the soil that’s growing my vegetables.
Sharpening
This is also the perfect time to repair damaged cutting edges of pruners, shears, shovels, and other garden tools used to cut. Sharpening these edges will make them more effective and safer to use. A sharpening stone or a specialized tool sharpener works best for pruners, shears, and loppers. For larger tools like hoes or shovels, a flat mill file is preferable.
Holding the tool steady (sometimes a vice helps), I work the sharpener against the edge of the blade, moving in one direction and maintaining the original angle of the blade. It’s crucial not to overdo it; usually, a few strokes are sufficient to restore a sharp edge.
After sharpening, I check the tool’s alignment, especially for pruners or shears. The blades should meet evenly along their length. If they don’t, I adjust the tension screw or bolt until they do.
Clean away any debris left from sharpening and add another thin coat of oil with a soft cloth. After winterizing, I store my garden tools in a dry place, ideally hanging them up or keeping them off direct ground contact.
4. Nurturing Every Corner: Equal Attention to Pots, Sprayers, Sprinklers, Hoses, and Lawn Mowers
While you’re still in the Fall cleaning mode, be sure to clean out any plant containers and pots you used this year, garden sprayers, hoses, sprinklers, and your lawn mower too.
Not only debris and soil left on tools, but also any left inside containers can harbor disease and viruses that can spread to the next plant placed in it. I use a brush and water to clean away visible soil and debris. Next, I spray the container with a 10% bleach solution or Lysol. For just a few, I use Lysol. If there’s enough to make it worthy of mixing a batch of bleach solution I use that.
“An ounce of prevention is worth a pound of cure.”
Benjamin Franklin
If I use a garden sprayer during the year, I add it to my cleaning checklist. Although I rinse it after each use, I give it a thorough cleaning with soap and water once a year. It’s important to clean the inside and out with soapy water, followed by a thorough rinse, to ensure it’s free from any residue that could clog the sprayer. Sprayers take a long time to dry, especially the hose, so I leave it out for several days until it’s completely dry before putting it in winter storage.
Hoses and Mowers
To winterize each fall, BEFORE it freezes, I disconnect hoses and sprinklers from hose bibbs and each other. To drain hoses, I lay them straight on the ground. Starting at one end, I lift it over my head and slowly walk the length of the hose while sliding it through my raised hands. Once it’s drained, I roll it up and store it in the garage for the winter. I drain and store sprinklers the same way.
At the end of the mowing season, it’s important to give your lawn mower some attention before storing it for the winter. I run the mower until it runs out of fuel and then clean the dried grass clippings and debris that may have been collected during the year. Next, I disconnect the spark plug before I sharpen or replace the cutting blades, followed by a thin coating of oil to prevent rust. Last, I disconnect the battery (on my mower that has one), and I’m finished!
As Benjamin Franklin said in 1736, “An ounce of prevention is worth a pound of cure.”
In summary, properly caring for tools will not only ensure they are ready to use in the Spring when we’re excited to garden, but it also prolongs their serviceable life and saves money. It’s easy to winterize your garden tools and hoses. Make it part of your garden routine each Autumn.


One Comment
Comments are closed.